DJ TECHTOOLS MIDI FIGHTER 3D
SETUP
You will need to update the Firmware and the device Settings, the first time you will use it with VirtualDJ, using the MF Utility :
- Download and install the Midi Fighter Utility from
Mac: https://s3.amazonaws.com/djtt-utility/mf_utility_installers/Midi_Fighter_Utility_OSX.dmg
Windows : https://s3.amazonaws.com/djtt-utility/mf_utility_installers/Midi+Fighter+Utility+Win.exe - Connect the Midi Fighter 3D to your computer, using the provided USB cable.
- Open the MF Utility and update the device firmware to the latest version if a newer version is offered.

- Download the VirtualDJ Settings file from https://virtualdj.com/files/tools/Midi%20Fighter%203D%20Settings.mfs and save it your computer.
- From the menu of the MF Utility, choose File -> Import Settings and then point to the mfs file you saved in the previous step.

Note
In case you have modified the default Settings of the device and wish to keep it and use with some other application, choose to Export the current Settings, before Importing the VirtualDJ ones. - Press the SEND TO MIDIFIGHTER button at the bottom of the MF Utility.
The Settings are now saved to the Midi Fighter and will be kept until the next time you send a different Setting to the device. - Close MF Utility.
Drivers: No driver software is required for the Midi Fighter 3D to be installed. The device is a USB class compliant and your Operating System will auto-install the necessary driver when connected with a USB cable.
VirtualDJ Setup
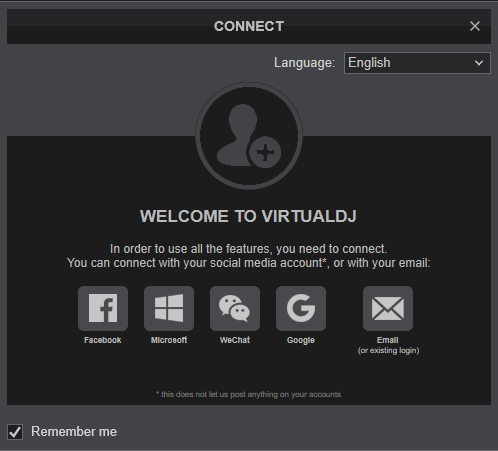
Once VirtualDJ is launched, a Connect Window will appear. Login with your virtualdj.com account credentials. A Pro Infinity, a Midi Fighter 3D Home Plus or a Pro Subscription License is required to fully use the DJTT Midi Fighter 3D.
Without any of the above Licenses, the controller will operate for 10 minutes each time you restart VirtualDJ.
https://www.virtualdj.com/buy/index.html
Click to OK.
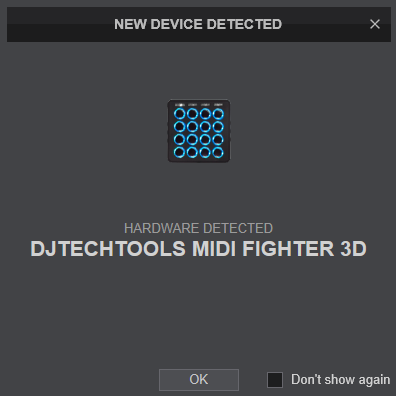
The unit is now ready to operate.
MIDI Operation
The unit should be visible in the MAPPING tab of VirtualDJ Settings and the “factory default” available/selected from the Mappings drop-down list. The factory default Mapping offers the functions described in this Manual, however those can be adjusted to your needs via VDJ Script actions.
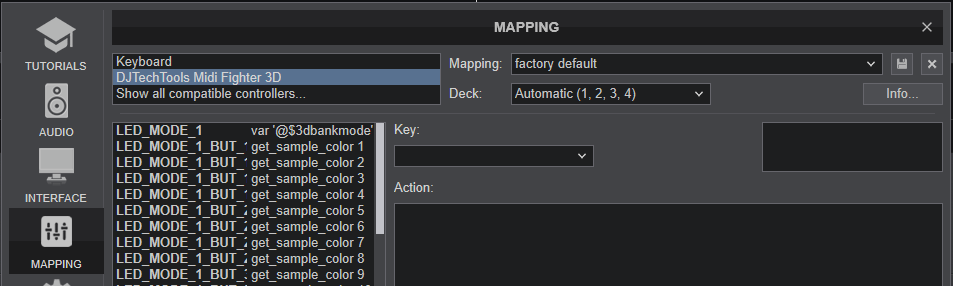
Find more details at https://www.virtualdj.com/wiki/VDJ8script.html
Audio Setup
The unit is not offering any pre-defined audio configuration, as no built-in audio interface is available. Depending on the sound card you need to use, manually create the necessary Master and Headphones audio configuration.
By default VirtualDJ will send the Master Output to the built-in (default) sound card of your computer.
See Audio setup examples in VirtualDJ Manual https://www.virtualdj.com/manuals/virtualdj/settings/audiosetup.html
For further software settings please refer to the User Guide of VirtualDJ. https://www.virtualdj.com/manuals/virtualdj8/index.html
LAYOUT
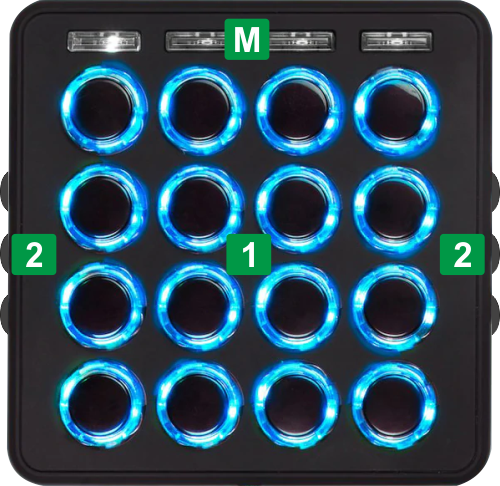
The functionality of the 4 available Modes is described in the following chapters.
MODE 1 - SAMPLER

Press the 1st MODE button on the Midi Fighter 3D (led will be turned on) to set the device to MODE 1. In this mode you can control the Sampler of VirtualDJ.
KEY
ACTION
MODE 2 - DECK CONTROLS
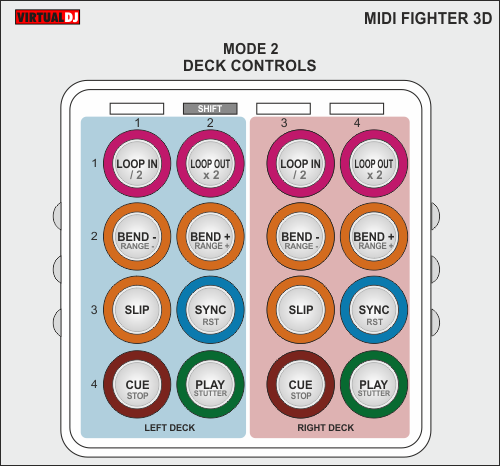
Press the 2nd MODE button on the Midi Fighter 3D (led will be turned on) to set the device to MODE 2. In this mode you have the most basic Deck Controls for Left/Right Decks
When MODE 2 button is selected, the same MODE 2 button acts like a SHIFT button, offering secondary functions to some buttons.
KEY
ACTION
SHIFT+BUTTON : Halves the size of the Loop
SHIFT+BUTTON : Doubles the size of the Loop
SHIFT+BUTTON : Selects previous available Pitch % Range
SHIFT+BUTTON : Selects next available Pitch % Range
SHIFT+BUTTON : Smoothly Reset Tempo (BPM) to the Track's original value. When button is fast-double pressed, the Tempo will reset instantly.
SHIFT+BUTTON : Stops Deck at previous Cue and cycle through available Cues
SHIFT+BUTTON: Play-Stutter for Left/Right Deck
The Side buttons are not pre-assigned to any action in this Mode
MODE 3 - PADS CONTROLS
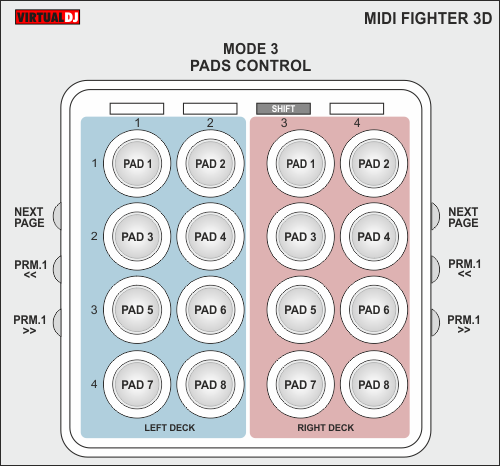
Press the 3rd MODE button on the Midi Fighter 3D (led will be turned on) to set the device to MODE 3. In this mode you have control over the Pads of Left/Right Decks
When MODE 3 button is selected, the same MODE 3 button acts like a SHIFT button, offering secondary functions to some buttons.
KEY
ACTION
MODE 4 - FX SHORTCUTS
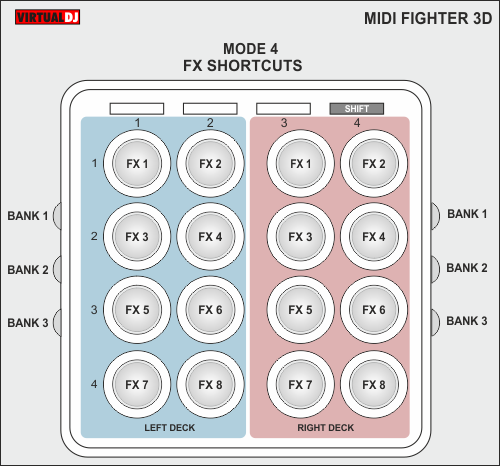
Press the 4th MODE button on the Midi Fighter 3D (led will be turned on) to set the device to MODE 4. This mode offers 3 Banks of 8 pre-defined Effect shortcuts (24 in total) for Left/Right Deck).
When the button is quickly pressed, the pre-defined Effect will be triggered. Push again to turn off. (Toggle)
When the button is held (for more than 1 second), it will trigger the pre-defined Effect, as long as the button is pressed. The Effect will be turned off when the button is released.(Momentary)
KEY
ACTION
FX Bank 1: Cut, Echo, Phaser and Flanger FX shortcuts
FX Bank 2 : Beat Grid FX shortcuts
FX Bank 3 : Scratch DNA FX shortcuts
ADVANCED SETUP
CUSTOM MAPPING
Every single button on each Mode can be customized to your needs using VDJ Script actions. See details in https://www.virtualdj.com/manuals/virtualdj/settings/controllers.html#custom%20mapping

Some useful notes for Custom Mapping:
- The MODE buttons leds only offer white color and cannot be changed.
- The leds of the 16 Arcade buttons can be assigned to the following colors...
black, red, darkred, orange, darkorange, yellow, darkyellow, green, darkgreen, cyan, darkcyan, blue, darkblue, violet, darkviolet, magenta, and darkmagenta
.. using the color 'colorname' action
If a different color is assigned, VirtualDJ will display the nearest available color
- The Midi Fighter 3D offers special MIDI messages when rotated vertically (left/right/up/down). These special keys are pre-defined and available in the Keys list, but are not assigned to any VDJ script action.
MIDI FIGHTER SETTINGS
DJTechTools offers a Utility to adjust several settings on the Midi Fighter 3D. You can download from ..
Mac: https://s3.amazonaws.com/djtt-utility/mf_utility_installers/Midi_Fighter_Utility_OSX.dmg
Windows : https://s3.amazonaws.com/djtt-utility/mf_utility_installers/Midi+Fighter+Utility+Win.exe
We have prepared a MF Settings file for VirtualDJ default Mapping, which is strongly advised to Import and not change, or else the default functionality may be broken. The Settings file can be downloaded from https://virtualdj.com/files/tools/Midi%20Fighter%203D%20Settings.mfs
